
Would you like to create and design your own online store but don't know where to start? It's normal to feel uncertain when starting your e-commerce business. Launching your business in the digital world requires a significant time investment; however, it's important to note that it's possible to start your e-commerce business with very little financial investment.
Today, thanks to technological advancements, it's possible to sell products online to the entire world. All you need is a good physical or digital product and a website where your customers can buy it.
On the other hand, it's possible to create and design your online store without any programming knowledge. That's why the Shopify platform is an excellent option, as you don't need a degree in this field to start selling online. Shopify has many advantages that will make your journey in e-commerce easier and much more enjoyable.
We'd like to share with you the 8 steps to create your online store on Shopify and start selling as soon as possible:
- Add the products you want to sell.
- Create the key pages for your online store.
- Select a theme and customize it according to your online store.
- Define and configure shipping rates.
- Configure your tax options.
- Configure the payment methods.
- Prepare your store for the launch.
- Launch your online store.
Before you begin, you should know that Shopify offers a 14-day free trial , giving you plenty of time to create and design your online store before launching it. This 8-step guide will help you set up and organize your e-commerce site so you can start selling online before your trial period ends.

1. Add the products you want to sell

The first step in organizing your online store is choosing your products with titles and descriptions. This process is one of the most important for educating, informing, persuading, and generating desire for your product. A good product description should highlight the main features and benefits to give the visitor enough information to click the buy button.
After adding the title and description, we move on to product images. Your customers' perception of your products depends on the quality and design of your product photos. Therefore, give quality photos for your online store the importance they deserve.

These three aspects are key to selling your product. Furthermore, if done well, they can positively influence your SEO strategy . This means more people will be able to find your products and have the opportunity to buy them if you create a relevant description and title. One of the main objectives of a good SEO strategy for an e-commerce business is to attract visitors and convert them into customers.
Remember that your product title should be descriptive and help Google's search engine to display it in search results. For example, if you sell leggings and one of your products is called "Sofia," Google has no way of knowing that "Sofia" refers to "Tie-Dye Yoga Leggings."
Once you've set up your first product, add a competitive selling price . Don't forget to conduct market and competitor analysis to ensure your product isn't priced too high.

To finalize your product setup, add the inventory and variations for each item. Inventory tracking will also help you maintain better control over your sales, and the platform automatically updates it with each purchase, so ensure you have accurate inventory for every product. Next, add any available variations , such as color, size, flavor, weight, and any other options your product might have.
We're sharing an example product from the women's online shoe store, Schutique . It includes a good product description, representative images of the shoes, size variations, and other details that can help you configure your products.

2. Create key pages for your store
Providing detailed product information for each item is important for sales. However, you also need a brand introduction , and your best ally is the pages within your online store. You should create these pages to build trust with your customers.
The most relevant pages according to Shopify are:
- Contact
- Who we are or About us
- Frequently Asked Questions
- Legal: return policies, privacy notice and terms and conditions
Contact page
The contact page will help you communicate with your customers. They can leave a question or comment there via a form. All Shopify themes include this option for creating a "Contact" form.
To create this page, follow these steps:
- From your Shopify dashboard, on the left side go to Online Store > Pages .
- Add a Page.
- Write a title. For example: Contact, Contact Us, or Write to Us.
- In the Content box, type any text you wish to communicate to your customers. This will appear at the top of the form, so there's no need to add it.
- At the bottom right, click on Template, expand the template suffix options, and select the page.contact option to configure the contact form.

Who we are or About us
On this page, you can share a bit of your brand's history and background. Create an informative page so your customers can learn more about the people who work here, the product creation process, and other aspects that will help them feel like part of your community.
Remember that a good " About Us" page will help you stand out from the competition and allow visitors to put a face to your brand and bridge the gap between you and them.

Frequently Asked Questions
The frequently asked questions section is a very effective element on your website as it can help your customer resolve purchase doubts , supports customer service by providing immediate answers, and builds trust by demonstrating your experience with your product and customers.
For example, we're sharing the frequently asked questions from our client Fantasías Miguel, where you can see their experience in understanding the common questions their customers have about their products and shipping.

Legal: return policies, privacy notice and terms and conditions
Customers often need to review your policies before making a purchase , so we recommend designing a policies page that includes your terms of service, refund or return policy, privacy policy, and shipping policy. Adding a policies section will make your customers feel more secure and confident when making a purchase, which is why it's essential to present it on your e-commerce site. No design is necessary for this page; plain text is sufficient.
3. Select a theme and customize it according to your store
Select one of the themes or templates that Shopify offers . There are hundreds of template options so you don't have to waste time designing; you can choose free or paid themes . Each template contains an ideal structure for creating catalogs, product listings, including details, and any other important element in your online store. When selecting a theme, think about your brand's personality and what you want to convey to your customers.

By choosing a theme, you can begin organizing your online store. You can change, arrange, and add the included sections to your liking . In the theme settings, you'll find options for images, banners, colors, typography, navigation, social media (where you can add links to your social channels), and many other settings that you'll discover as you explore this section.

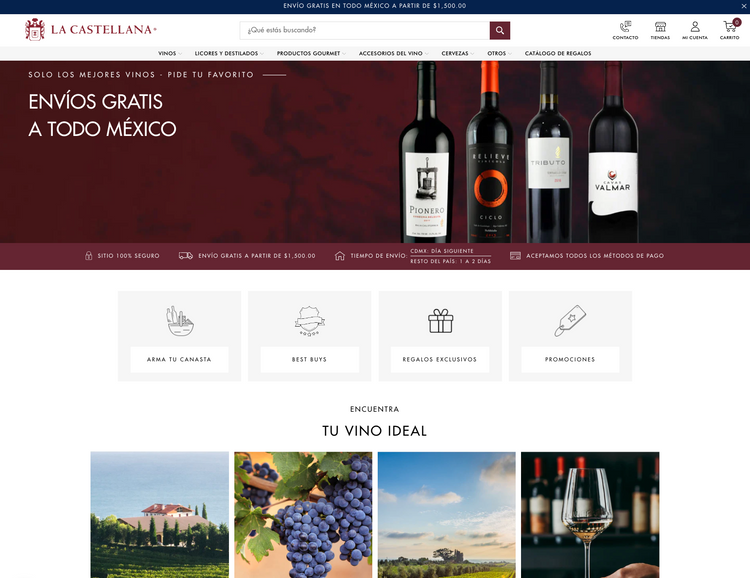
Design the Homepage With photos and text that grab attention within the first 3 seconds of someone visiting your online store . Here you can analyze whether the images align with what your brand wants to communicate to users, and you can change the images depending on the time of year or a special event, for example, your brand's anniversary.
Here's a great example from our client Pai Pai Cosmetics. Notice how they capture attention within the first few seconds of visiting their online store. The photos showcase all their products and discounts to encourage customers to buy immediately.

Don't forget to customize an effective checkout for your e-commerce site. When configuring your theme, you can edit the checkout design, which is the final step for your customer to complete their order. If you can allow guest checkout, without requiring them to fill out a lengthy customer information form, even better! Your customer has likely already invested time reading and selecting the products they want to buy, so make their purchase as quick and easy as possible.
4. Define and configure shipping rates
Decide on your shipping strategy and configure the zones to add rates in real time. For shipping logistics, we recommend starting to look for courier companies that offer better wholesale prices. Since shipping costs aren't very high, you can create different strategies, such as offering free shipping one day a month when you buy a specific product.
To configure shipping rates, go to Settings > Shipping and Delivery. For example, you can create shipping strategies such as free shipping on orders over $999 or set shipping costs by state.

On the other hand, it's always important to communicate purchase and shipping notifications to the customer. Shopify already provides email notification templates and also gives us the option to customize them with our logo and desired button color. Emails are sent automatically when someone makes a purchase, as well as to notify them when their order has shipped, including the tracking number. To customize the notification emails, go to Settings > Notifications and click the Customize button.

5. Configure the tax options
Shopify's tax settings depend on your country of origin. Here, you can choose whether or not to include the applicable tax percentage in your online store's prices, depending on the product you offer.

You can configure your Shopify account to automatically handle the most common sales tax calculations. You can also configure this for each individual product. Always check with your tax authority to ensure you're charging the correct tax rates.
6. Configure the payment methods
Decide which payment options you want to offer; it's essential to offer as many payment methods as possible in your online store . This allows your customers to choose to pay for their orders using any of the methods you've enabled. Payment methods are an important factor in building trust with your customers at the end of their purchase.
We recommend using payment gateways that you can install through Shopify, such as Stripe or Mercado Pago . Analyze which one best suits your online store. These gateways are ideal if you want your customers to pay by credit card. However, there are other ways to pay online without using a credit card directly, such as PayPal .
You can manage all payment methods in your store in the Payment Providers section in Shopify, so be sure to add all possible payment methods.
7. Prepare your store for launch
You're almost finished with the essential settings for your online store!
Add your custom domain name , preferably short and descriptive so it's easier for your customers to remember . Additionally, if your domain name includes one of your online store's keywords, it will help improve your organic SEO ranking in search engines. We recommend purchasing your domain name through GoDaddy , as the connection with Shopify is automatic and takes only seconds.
8. Launch your store
Disable the password so your store can be viewed. Go to Online Store > Preferences > Password Protection > Click Enable Password
Create and generate the most traffic to your online store . The most important thing is to reach your end customer, so plan your digital marketing strategies to generate a higher number of monthly sales.
With Shopify, you can add your Facebook pixel and connect your accounts to generate ads and promote your online store and products. Additionally, the platform includes a reports and statistics section to help you better analyze your strategies.

After completing these 8 steps to create your online store, we recommend reading our blog post, "7 Key Elements Your Online Store Should Have. " Click here to read it .
Conclusion
What we love most about Shopify is that it's a secure option for creating online stores for anyone wanting to start their own e-commerce business. Shopify already has everything you need so you can focus solely on selling.
